Editing My Horror Opening
I did videos and screenshots of my editing process, I didn't do every step, but I did do the most important edit steps that I did.
Adding A Clip
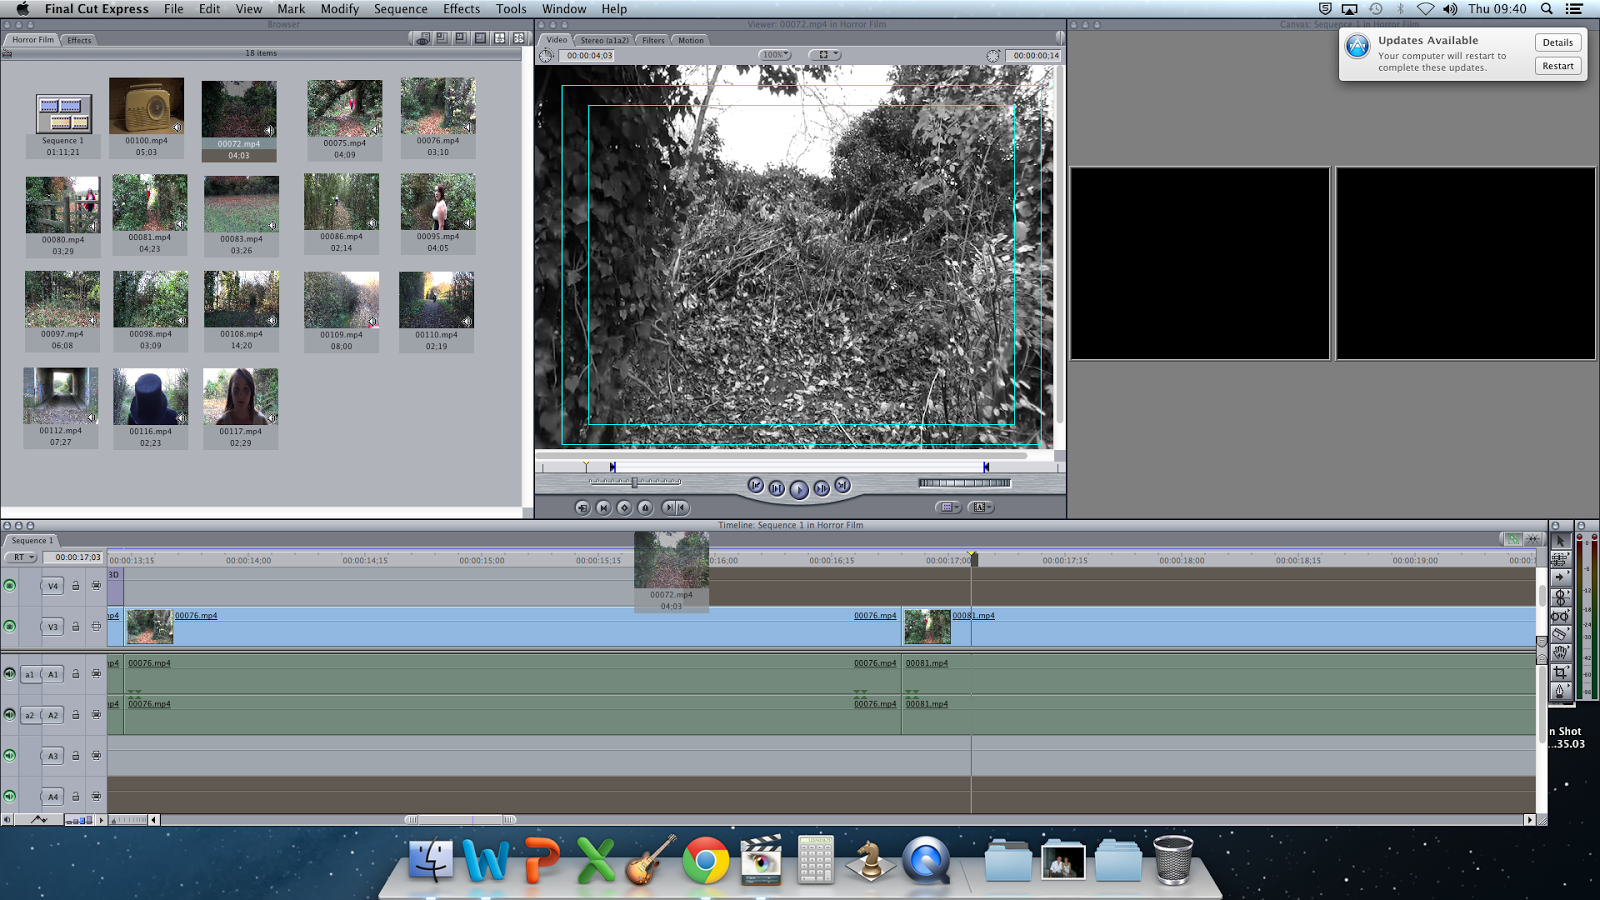
To add a clip in the right place, I had to crop it by pressing the
"I" button for where I want it to start and
"O" button for when I want the clip to end. Then, I dragged the clip from the middle screen and put it where I wanted it to be in my horror opening. Then I had to render it before I could watch it to see if it looked ok.
Changing The Clip So There Is No Sound
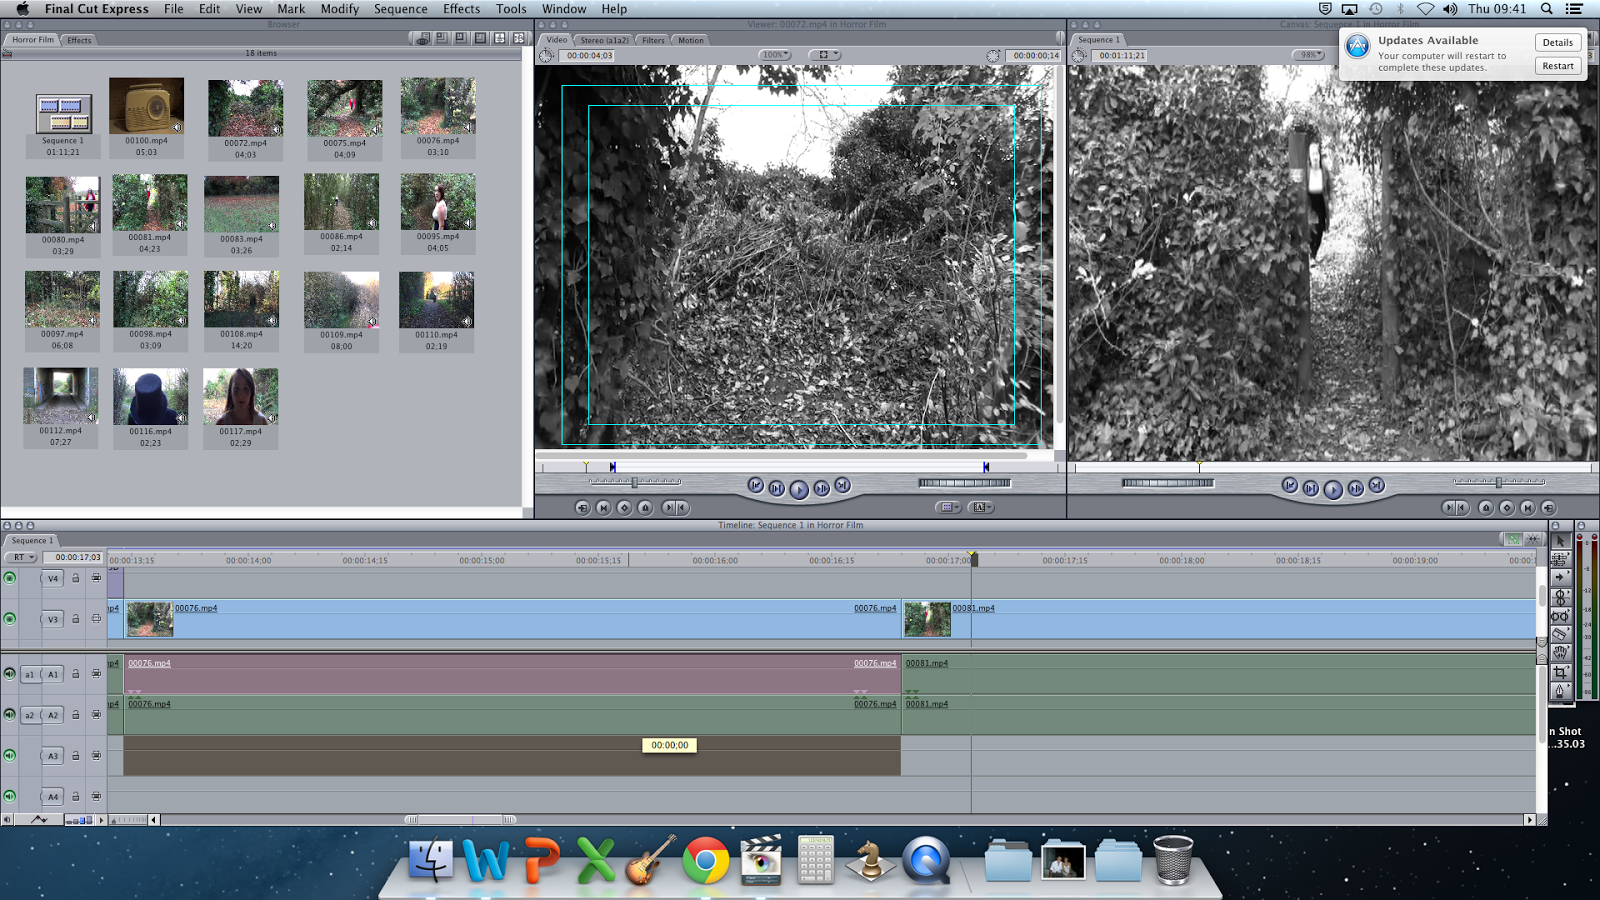
To change the clip so there is no sound, I needed to drag the audio bars up to the section which I had muted any sound, then when I played it back there was no sound playing where I wanted it to be muted and then there was sound when I wanted there to be sound.
Changing Image Filter
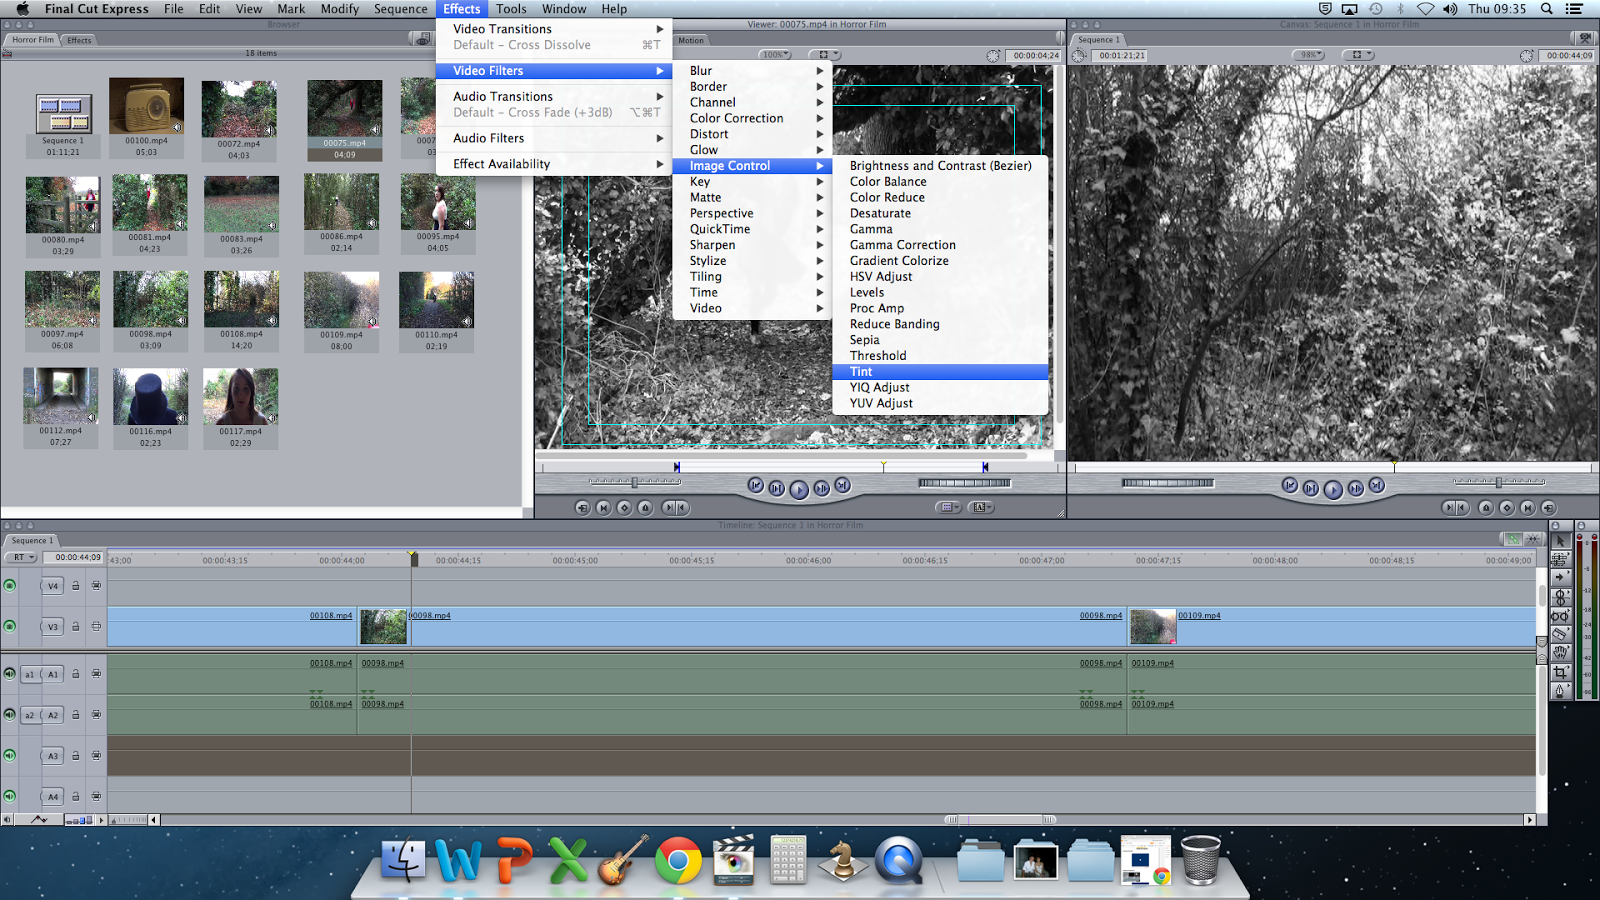
To change the filter from normal coloured to black and white, I had to go on
"Effects", then
"Video Filters", then
"Image Control" and then press
"Tint". Then I had to render it, by pressing command and
"R", then when I played it back the colour would be black and white instead of colour. I had to do this process for every clip I had.
Adding and changing text
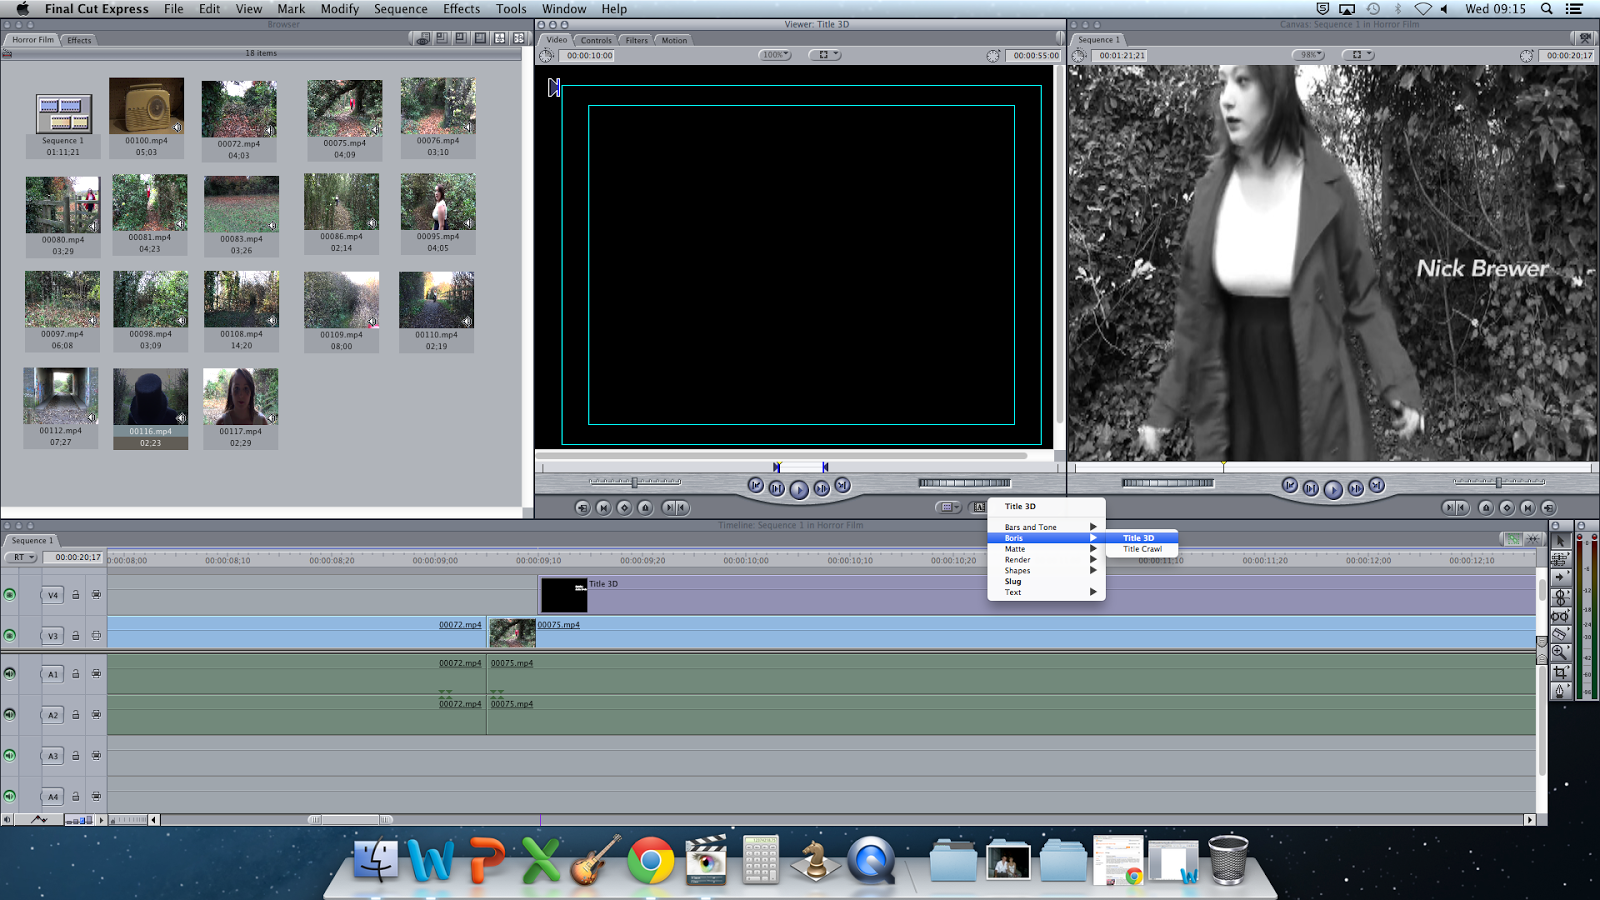
To add text, I needed to press the
"A" on the right hand side of the middle box, then press
"Boris" then
"Text 3D". This would then take me to a black screen and I had to go on
"Controls" and then I could change what I write, the font it is and so on. Once I had got the text I wanted and in the right position, I dragged it down to the line above the film line and cut it to where I wanted it to stop.
Splitting My Clip So I Just Have The Sound Of The Scream
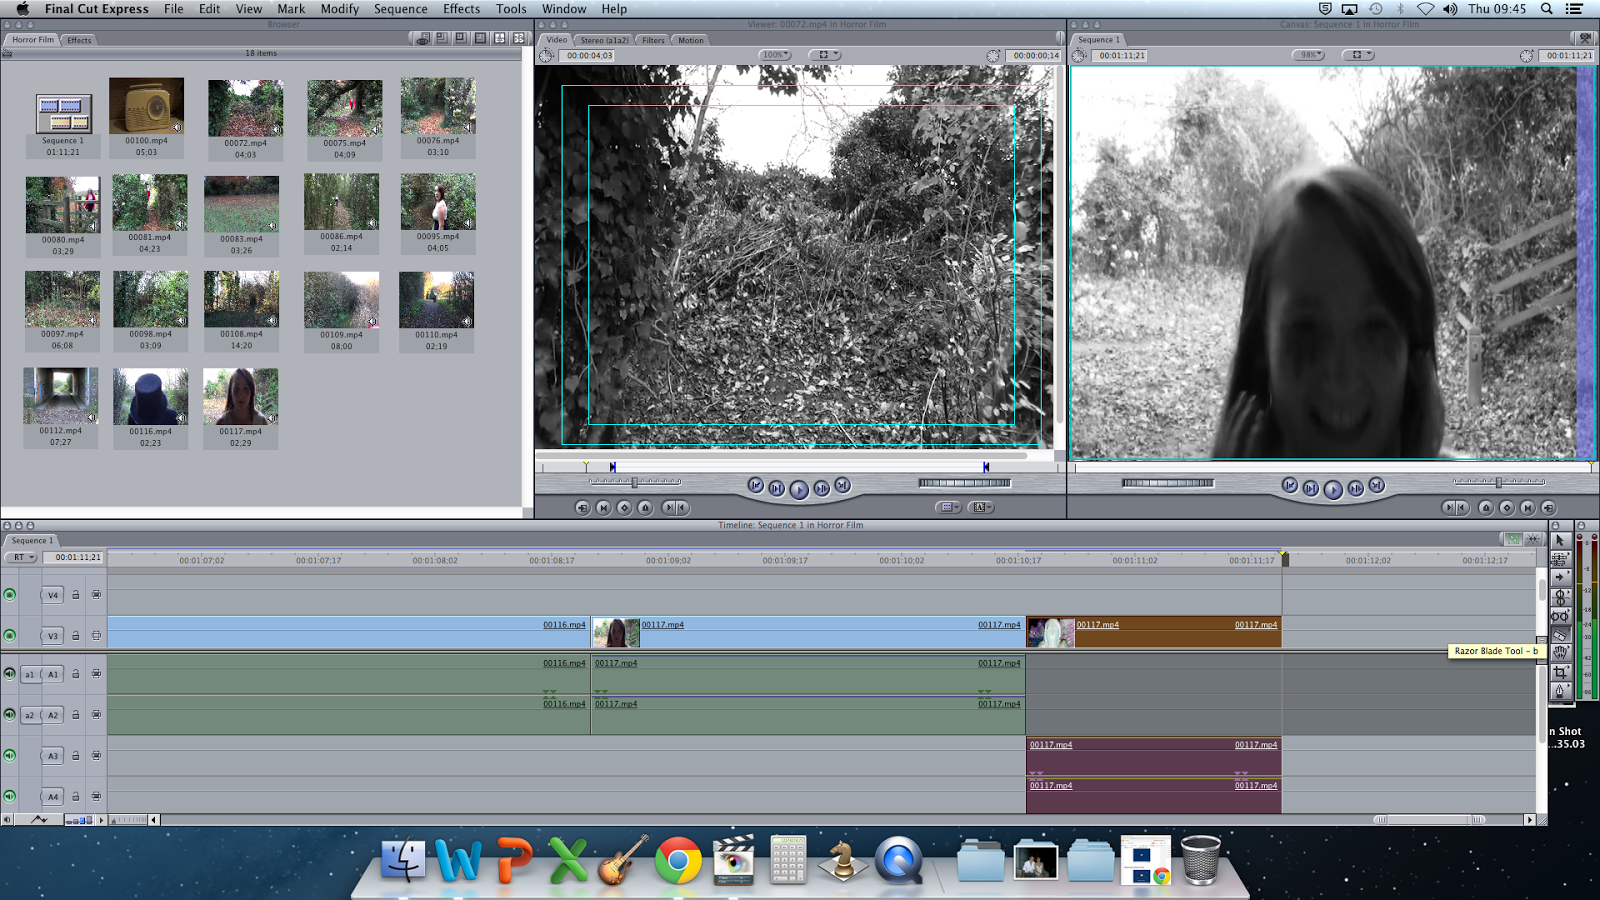
To split my clip in two, I had to click on the splitting tool on the
tool bar to the right of the screen. Then I had to find the place just before Jodie screamed, which took a lot of trail and errors before I found the right point. I then dragged the section where I don't need the sound for up to the mute section, so when I played it, it starts off quiet, missing the sound of cars, and then the only thing I can heard is the scream.
Adding In The Title
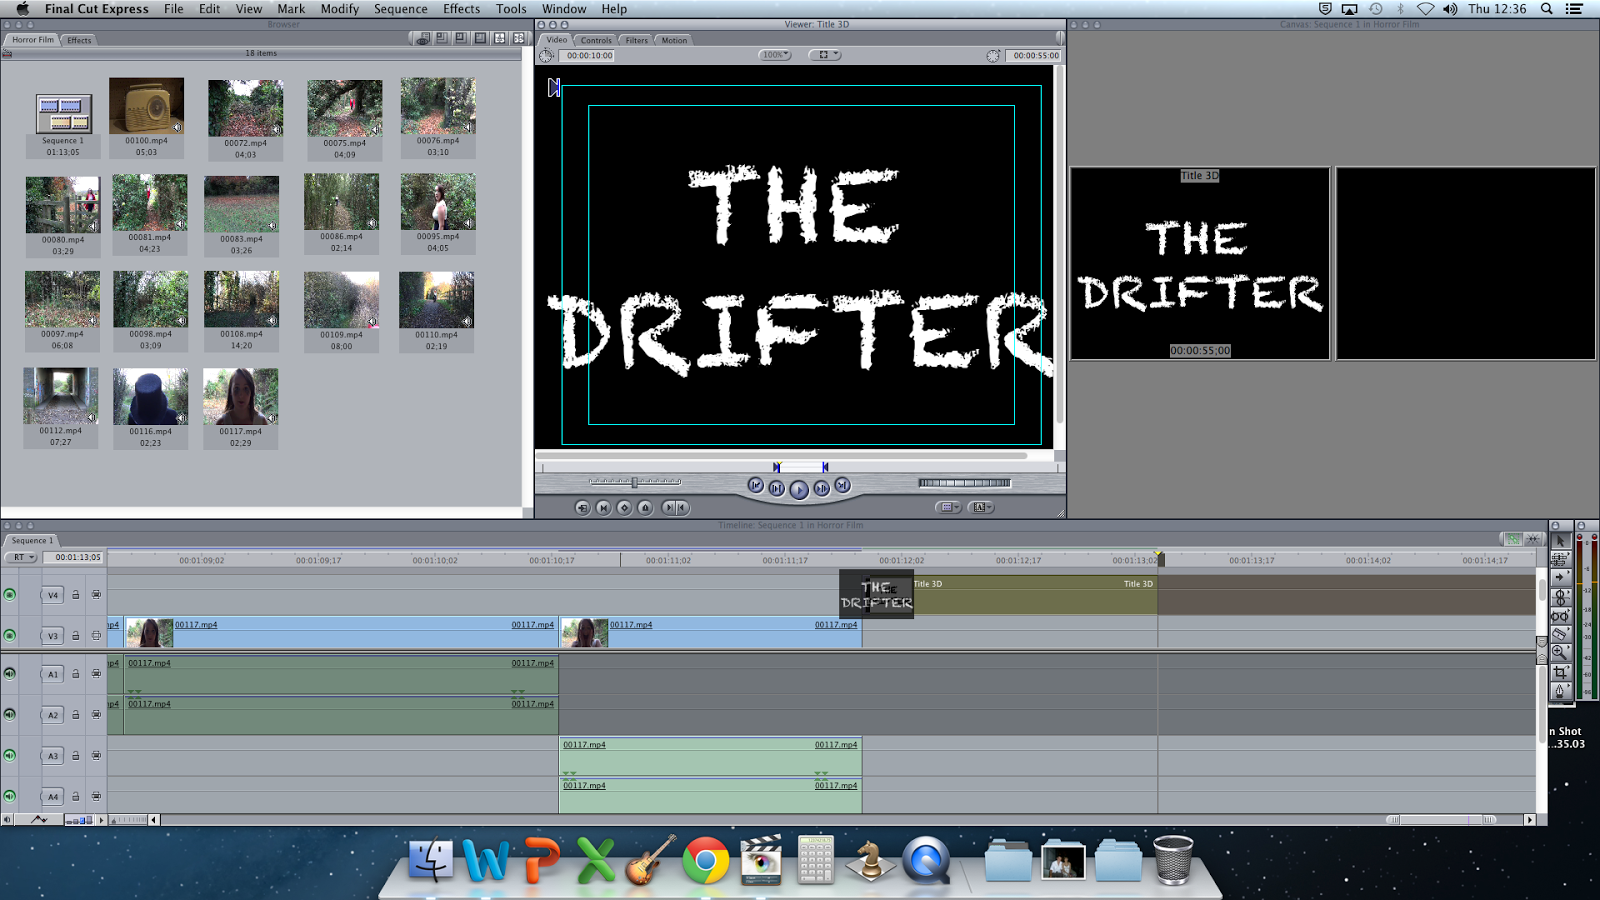
To apply the title, I started by doing the same process I did for applying any other text I wanted, but this time I used a different font. The font I used was
"Chalkduster" and the reason I used that font rather then
"Chiller" is because
"Chiller" wasn't on the mac's, so instead I tried to find another one that looked just has spooky. This font also looked like a character within my horror opening could have written this, therefore it has more of a connection to my film.
Adding A Warner Brothers Logo and Adding My Own Sound to it
I decided to use a Warner Brothers beginning as well as my own institutions beginning because it made my opening a bit longer. It also built more tension to my opening. The song I used was just a mixture of different types of low notes put together, which made it sound scarier.
Adding And Changing The Colour Of My Institution
To add in the clips, I did the same process as I did for the other ones, but I had to put the same clip in three times because just having one clip was too short, so I made it longer by putting the same clip in three times.
I didn't want my institution to be the normal colours, so I decided that I wanted it to be in Sepia rather then Black and White because the rest of my opening is Black and White. I went on Effects, Video Filters and then Image Control and then went on Sepia. I also so made the image blurred, to give more of a distorted effect.
Adding The Music Into My Institution
To add music into my institution, I had to get my music, which is copyright free, off of my documents and then I had to drag it from there onto my opening. I had to drag it underneath the others because I knew that it was going to be longer then I needed and I didn't want it to cut some of my music out.
I then cut it, by using the 'cutting tool' on the toolbar. I cut it firstly in the wrong place, so I then had to undo it and re-cut it in the right place. The music didn't start straight away either, so I cut it so that when my institution started, so did the music.
I then had to fade in and out both of my music files. To do that, I needed to click on the arrow in the bottom left hand corner, then click the 'show audio waveforms' button, then I clicked the zigzagged line and then moved the lines so that it faded in and out when I wanted it to.
Adding In James's Voice-over
To add in James's voice-over, I had to go onto the folder it was in and click and drag it to the point that I needed it to be in. I found out that it was slightly too long, which is one reason why I added pauses, so that if it was too long or short I could change it to make the pauses longer or shorter. I cut one pause out and then it was just long enough to then add a copyright free sound effect of a heartbeat.


 To add text, I needed to press the "A" on the right hand side of the middle box, then press "Boris" then "Text 3D". This would then take me to a black screen and I had to go on "Controls" and then I could change what I write, the font it is and so on. Once I had got the text I wanted and in the right position, I dragged it down to the line above the film line and cut it to where I wanted it to stop.
 To split my clip in two, I had to click on the splitting tool on the tool bar to the right of the screen. Then I had to find the place just before Jodie screamed, which took a lot of trail and errors before I found the right point. I then dragged the section where I don't need the sound for up to the mute section, so when I played it, it starts off quiet, missing the sound of cars, and then the only thing I can heard is the scream.
  To apply the title, I started by doing the same process I did for applying any other text I wanted, but this time I used a different font. The font I used was "Chalkduster" and the reason I used that font rather then "Chiller" is because "Chiller" wasn't on the mac's, so instead I tried to find another one that looked just has spooky. This font also looked like a character within my horror opening could have written this, therefore it has more of a connection to my film.